Showing posts with label robotics. Show all posts

Wednesday, August 17, 2016

Bits to Atoms: Reversing Skewed Triangle

Python Turtle:


LogoTurtle:

Monday, January 25, 2016

Generative Art with the LogoTurtle

The LogoTurtle is a programmable turtle that can draw. I like running simple programs with small aspects of randomness because the resulting drawings are always a surprise, and often beautiful. When randomness is part of a program the robot will draw a different composition every time, but it's also fun to look at several drawings resulting from the same program and see the similarities. The robot is enacting controlled chaos, and both the controlled parameters and the chaos within those limits can be seen after several runs. I also like how the robot is a kind of partner in creativity as it makes its own decisions within the framework it's been given.

Monday, August 10, 2015

Wall Follower Robot

Version 1
Version 2
I decided to make a robot that follows a wall on its right side. I have an NXShield-Dx, a shield that sits on the Arduino Uno and connects it to the motors and sensors of the Mindstorms NXT. The NXT motors are great, and I used one NXT ultrasonic sensor. With the Arduino I could also use an Arduino compatible distance sensor so I got a range sensor at Radio Schack (on sale for $15!). In both designs I put the NXT sensor facing forward to detect obstacles directly in front that the side detector can't see, and the Radio Shack sensor directed to the right side to detect the wall. For power I

Tuesday, July 28, 2015

How To Get From Blocks to Text With Robotics Coding

  
So many rich block-based programming environments have become available during the last several years. The release of Scratch into the world by MIT Media Lab's Lifelong Kindergarten Group catalyzed the invention of similar block-based environments for all sorts of purposes and a revolution in novice learners' ability to use the building blocks of computer science to imagine and make things. Block-based environments provide the important affordance of building programs without making

Monday, November 18, 2013

Programming TETRIX Servos With leJOS NXJ

The last time I taught my high school robotics class I used RobotC to program TETRIX servos. The RobotC API provides the functions servoValue, servo, and servoChangeRate. From the documentation we learned that the only way you can be sure not to push your servo against a physical barrier and damage it is to avoid setting it to a position it can't reach. The easy programming also allowed us to avoid learning about how servos really work. leJOS NXJ has tools for dealing with servos that afford a much better learning experience, in my opinion. The leJOS API provides setRange(), setAngle(), setPulseWidth(), getAngle(), and getPluseWidth(). At the very least you will need to call setRange and setAngle on servos. That's because setAngle depends on a range of movement having been set with setRange. With leJOS it behooves you to set servos to a safe range of movement before moving it around, and to do so you have to understand something about how pulse width modulation makes servos run. Two articles do an excellent job explaining how to servos work , one from Jameco Electronics and one from Science Buddies. But there is still a gap of information when it comes to using the setRange and setAngle methods. The documentation provides the following:

public void setRange(int microsecLOW, int microsecHIGH, int travelRange) "Set the allowable pulse width operating range of this servo in microseconds and the total travel range. Default for pulse width at instantiation is 750 & 2250 microseconds. Default for travel is 200 degrees. " The parameters are defined as follows:
microsecLOW - The low end of the servos response/operating range in microseconds
microsecHIGH - The high end of the servos response/operating range in microseconds
travelRange - The total mechanical travel range of the servo in degrees
To better understand what these values mean I created some diagrams that make clear the function of each parameter.
The minimum and maximum PWM allowed are 750 and 2250, but if you use these  you are in danger of hitting the robot.
If the servo horn is attached such that the servo's physical stops are tilted the arm can hit the robot even with a safe min and max PWM range.
The third argument to setRange sets the number of programmable positions  between the min and max limits.
Setting the travelRange to 10, for example, will greatly reduce the precision it is capable of.

Monday, October 14, 2013

Music class for use with leJOS NXJ playNote and playTone methods

As an exercise I've written a Music class that makes writing NXT melodies easier by allowing note values to be passed instead of frequencies. I used this page as a reference: http://www.phy.mtu.edu/~suits/notefreqs.html. Any suggestions are appreciated. I hope someone finds it useful! Here's a little vid: http://blogs.hewittnet.org/robotics/files/2013/10/IMG_1008.mov

import lejos.nxt.Sound;
public class Music {
    private static String[] notes = { "C3", "C#3", "Db3", "D3", "D#3", "Eb3",
            "E3", "F3", "F#3", "Gb3", "G3", "G#3", "Ab3", "A3", "A#3", "Bb3",
            "B3", "C4", "C#4", "Db4", "D4", "D#4", "Eb4", "E4", "F4", "F#4",
            "Gb4", "G4", "G#4", "Ab4", "A4", "A#4", "Bb4", "B4", "C5", "C#5",
            "Db5", "D5", "D#5", "Eb5", "E5", "F5", "F#5", "Gb5", "G5", "G#5",
            "Ab5", "A5", "A#5", "Bb5", "B5", "C6" };
    private static float[] frequency = { 130.81f, 138.59f, 138.59f, 146.83f,
            155.56f, 155.56f, 164.81f, 174.61f, 185.0f, 185.0f, 196.0f,
            207.65f, 207.65f, 220.0f, 233.08f, 233.08f, 246.94f, 261.63f,
            277.18f, 277.18f, 293.66f, 311.13f, 311.13f, 329.63f, 349.23f,
            369.99f, 369.99f, 392.0f, 415.3f, 415.3f, 440.0f, 466.16f, 466.16f,
            493.88f, 523.25f, 554.37f, 554.37f, 587.33f, 622.25f, 622.25f,
            659.26f, 698.46f, 739.99f, 739.99f, 783.99f, 830.61f, 830.61f,
            880.0f, 932.33f, 932.33f, 987.77f, 1046.5f };
    /**
     * method uses playTone method
     * @param note is a String representation of the musical note in range C3-C6. See notes[] for allowed values
     * @param duration is note duration in ms
     */
    public void musicTone(String note, int duration) {
        for (int i = 0; i < notes.length; i++) {
            if(note.equals(notes[i])) {
                Sound.playTone((int)frequency[i], duration);
                Sound.pause(duration);
            }
        }
    }
    /**
     * method uses playNote method with Sound.XYLOPHONE as instrument argument
     * @param note is a String representation of the musical note in range C3-C6. See notes[] for allowed values
     * @param duration
     */
    public void musicXylo(String note, int duration) {
        for (int i = 0; i < notes.length; i++) {
            if(note.equals(notes[i])) {
                Sound.playNote(Sound.XYLOPHONE,(int)frequency[i], duration);
            }
        }
    }
    /**
     * method uses playNote method with Sound.PIANO as instrument argument
     * @param note is a String representation of the musical note in range C3-C6. See notes[] for allowed values
     * @param duration
     */    
    public void musicPiano(String note, int duration) {
        for (int i = 0; i < notes.length; i++) {
            if(note.equals(notes[i])) {
                Sound.playNote(Sound.PIANO,(int)frequency[i], duration);
            }
        }
    }
    /**
     * method uses playNote method with Sound.FLUTE as instrument argument
     * @param note is a String representation of the musical note in range C3-C6. See notes[] for allowed values
     * @param duration
     */        
    public void musicFlute(String note, int duration) {
        for (int i = 0; i < notes.length; i++) {
            if(note.equals(notes[i])) {
                Sound.playNote(Sound.FLUTE,(int)frequency[i], duration);
            }
        }
    }
}
Here is an example implementation of the class:

import lejos.nxt.Sound;

public class MusicTest {
    private static String[] melody = { "C4", "D4", "E4", "C4", 
        "E4", "C4",    "E4"};

    public static void main(String[] args) {
        Music music = new Music();
        for (int i = 0; i < melody.length; i++) {
            music.musicPiano(melody[i], 300);
            System.out.println(melody[i]);
        }
        Sound.pause(300);
        for (int i = 0; i < melody.length; i++) {
            music.musicTone(melody[i], 300);
            System.out.println(melody[i]);
        }
    }
}

Sunday, December 18, 2011

Do Women Make Technology Differently?

This is a very nice post by Carla Diana. It makes me more determined to bring opportunities to my school for girls to make technology.

Sunday, September 25, 2011

Students Managing Their Own Data

Moodle RSS block

Post on Tumblr

Post pulled into Moodle page
I'm trying an experiment this year with my high school robotics students. I had been wanting them to document their work in a fun and creative way so I thought I would have them set up Tumblr accounts so they could easily post not only their code but videos and photos with their phones. Then I got thinking that I could pull in the RSS feeds from their Tumblrs to our Moodle class site. There's a block, or widget, for just that in Moodle. Then I thought why not just put them in the teacher role and give them an assignment to figure out how to connect up their own feeds. They didn't know what RSS was but I explained the concept and the purpose and gave them a couple hints. A few of them did figure it out and the rest did the next best thing, which was adding a link to their Tumblr on the page.

Why go to all this trouble? I think this exercise is important because they need to have experience making things with web tools for real purposes, not just using the web.

UPDATE on this: So one of my students got re-blogged by a porn site. I had to end the experiment. Fortunately I caught the spam before she could see it. Made me disappointed in the Internet.

Maker Faire NY

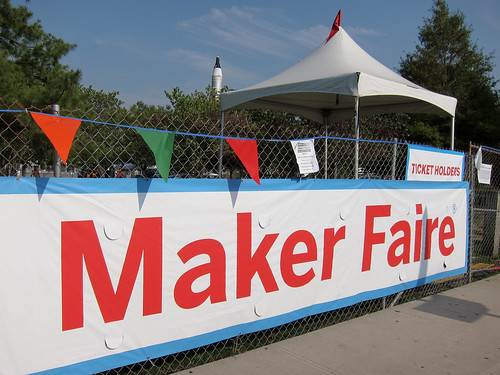
I had the great fortune of attending Maker Faire NY for the second time. What a thrill! And this time the highlight was bringing some of my students. I decided to bring a few students from each age division of our school so everyone from young to old could enjoy it. I plan to have the students present pictures and videos to their peers and talk briefly about what they found inspiring and exciting.

What amazed me was that most of the projects on exhibit were different from last year. Of course some things have already become and deserve to be standard fare, such as MakerBots and the Life Size Mouse Trap. But the growth of affordable 3D printer technology was evident with so many more types on exhibit. I'm just amazed at the successful effort to coordinate so many new makers and their work in one place. What an event!

Some highlights were watching my older students attend a 25 minute presentation at the lockpicking booth so determined to learn the secrets inside the average lock, seeing the younger students' delight at 3D printers printing chocolate and cheese, the middle schoolers playing with the robotic drummer, walking into a wacky techno duo set bathed in technicolor patterns with Game Boys and Casios hanging off the musicians, and interacting with so many kinds of robots. Putting Flip cameras in the hands of the students was great because as our groups split up to explore different areas I got to learn about twice as many amazing projects than I would have had we stayed in one group, like the keyboard-on-a-glove.

The best thing about the whole trip was the chance to show girls the huge variety of applied science and technology there was to see. It was a great step in our effort to help them see themselves as makers of technology and not just consumers of it.


Tuesday, July 19, 2011

Controlling LED from a web page with Arduino and Ethernet Shield

I figured out how to make my Arduino into a web server pretty quickly, especially since the example program does just that. What was hard was to go the other way, controlling it from a web page. I got that working finally by cobbling together bits and pieces of this project and this project. What I wanted was a couple of form input buttons that would turn on and off an LED. That's what this does. One issue I still have is the first time you submit the Arduino responds immediately but from then on you have a passed value in the URL and for some reason you have to click twice to get the Arduino to respond. Actually it does respond the first click but goes back to its previous state, then stays on the new state on the second click. Something more complicated is going on than I can yet understand. Anyway, it's cool and now I think lots of possibilities are opened up.
Well, I tried posting the code here but the WYSIWYG eats a lot of it, so here it is in a txt file, linked here.
UPDATE: Ha, an anonymous reply (thanks!) solved my double-click problem. Add a break; after each digitalWrite which makes sense now:

if(c == '0') {
digitalWrite(9, LOW);
break;
}
if(c == '1') {
digitalWrite(9, HIGH);
break;
}


Monday, November 29, 2010

Cricket Microcomputer Cell Phone

Created by my 9th graders! What I love about this is the experience of cramming all the electronics inside a box. They even routed the IR beamer from the computer to inside the box so it matches up with the transceiver inside. It really feels like an electronic object with the UI on the outside and the complicated stuff on the inside. This is a simple robot as you can't choose the numbers you dial but just hit the same switch and it dials pre-programmed numbers that are displayed on the LED. We aren't working on conditional statements yet. It is their first project after all.

Monday, November 22, 2010

Super Cricket IR Distance Sensor

Gleason Research released a new sensor to use with their Super Cricket microcontroller. It's an infrared distance sensor, which got me excited thinking we can start doing with the crickets what my younger students have been doing with NXT robots. When I tested them out I found that rather than outputting the actual distance reading, the sensor sends the microcontroller data similar to that of other cricket sensors--that is, a number from 0 to 255 that is inversely related to the intensity of environmental variable. So as the photocell sensor returns a higher number for lower light levels and a lower number for higher light levels, the distance sensor returns a higher number for close distances and lower for greater distances. You could work out some data points and calibrate the sensor that way for use in a conditional statement, but it would be nicer to have it return an actual distance. With the aid of this website, I was able to figure out a conversion formula that takes the raw data and outputs something close to actual centimeters. I used the formula given on the website but had to divide the result by 2. Its range is about 8 - 50 cm and it's more accurate from 8 - 15, becoming progressively wider than actual centimeters until up around 50 cm it's about 5 cm too wide. There is probably some fiddling I could do with the formula to lessen the slope a bit but for our purposes--making a functional educational robot--it should work well enough.

So here's a test program I put together:

global [distance]
to convert
     setdistance ((2914 / (sensora + 5) - 1) / 2)
end
to main
     loop 
     [convert
     display distance 
     wait 2]
end
This will display the sensor data, converted to cm, on an LED display.

Friday, November 19, 2010

Exciting Developments with Microsoft Kinect

I'm much more excited about what people are doing with Kinect than what Kinect is made to do out of the box, no matter how Microsoft feels about it. There are some great developments, and so quickly!

And to think after I showed my students a couple early hacks they wondered why you would want to do that...

Thursday, November 11, 2010

Robotic Inventions

I couldn't make a nicer microwave myself!

Sunday, August 01, 2010

Black Box Antidote

UPDATE: How timely that there is a new Make video podcast on how to change a broken iPhone touch screen!

This week I taught a robotics workshop to several Bronx teachers. One of my themes for the workshop was providing their students with an alternate view of technology to the 'black box' model that's becoming more and more prevalent. That is, the idea that technology is given to us consumers ready to use and we shouldn't mess with it if it doesn't do what we want it to, Apple mobile devices being the prime example.

To make this point I showed two videos, the first being an SNL Weekend Update in which Steve Jobs talks about the virtues of the iPhone 3, then closes by admitting the battery only carries 20 minutes of charge (It's a spoof). Then I played a video detailing the steps to change your own iPhone battery. It amazes me that in order to maintain the pristine case you are forced to remove the motherboard to access the battery--the most user-replaceable part there is. It would be so easy to put a little door on the back to pop those failed batteries out, but that would ruin the look and feel of the device.

Not that I dislike Apple products or think people who have iPhones have made a poor choice. They are great for what they do. But I don't want people to think we have to be at the mercy of the company making the technology if it's not working properly or if we want it to do something it wasn't specifically designed to do. (I'm a big fan of MAKE magazine, too, for that reason.)

The best thing about teaching robotics is that it's all about inventing with technology. A robotics kit is simply a tool kit that only begins to do something when you have a purpose in mind and make the robot do it. It's a unique experience for most kids to have such control over technology and hopefully that feeling can extend to technology in general.

Wednesday, May 26, 2010

Nuts and Bolts

My Advanced Robotics students have made a lot of progress this year. They are so proud of what they've accomplished; autonomous NXT critters, a choreographed dance with TETRIX robots, and just now a joystick-controlled mobile robotic arm. TETRIX parts require a lot of tools and these girls were not used to attaching things with screws, nuts, bolts, allen wrenches, and screwdrivers. I noticed something interesting during one of our classes this week. They were completing their construction of the robotic arms when one student said, "No, put the screw on that side and the back on this side." She referred to the kep nut as a "back" again later. I couldn't imagine why she would call a nut a back. It finally occurred to me she was talking about earrings and when I asked her if that's what she was referring to she smiled, knowing it wasn't 'correct' but it worked for them. One thing they've gotten out of their experience this year is a way to relate to making robots from their own perspectives, nuts, bolts, and all.

Wednesday, December 16, 2009

Making Robots Real: Constructionism and Robotics

I'm finally teaching robotics the way I've been wanting to for the last 5 years. Really the way I've been wanting to teach period for the last 17 years! Early on in my teaching career I read about constructionism and wanted to get my students doing writer's workshop, writing their own meaningful stories that intrinsically motivate them to become better writers. It never happened to my satisfaction because I could never find the right balance between teaching didactically and giving students the freedom to write what and how they wanted. Suddenly I find that it's coming together in my 9th grade robotics class. My students are inventing their own robots, and long-story-short here's how it happened.

Last year was my first year teaching 9th grade robotics and I went into it with the intention of making it as rigorous as they could handle with a focus on fundamental programming concepts. So while it was project-based in the sense that they produced projects, such as a vehicle that could follow a course taped out on white paper, I laid out a series of goals for them to reach so they could develop each project with progressively more sophisticated algorithms. What ended up happening is that a few students completed and understood everything, most got some of the way through the challenges, and some barely got past the first step, having been stuck just getting the project built and communication down. At no point during the class did I feel that they had ownership of their projects. When they completed the projects I gave them all they wanted to do was sit and talk rather than try more ideas.

This year I decided to give them more control over what they made and let their needs dictate the programming concepts they would learn. From the outset I gave them very few parameters--the first project simply had to involve programming the LED display, the second project using motors to illustrate gearing up or down and a switch to activate the motors--and have given them little explicit programming instruction. They have been much more involved in their projects and there have been many great opportunities to teach programming concepts that have been useful to them. In one case, a student had three procedures that were separate actions of her DJ robot and to get them all to run, she was typing their names separately in the direct command line. I hadn't taught them about creating a 'main' procedure that calls the sub-procedures. But once I showed her that it made sense right away. She was able to then go on to show the class and teach them the concept in a more effective way than I could have.

I think one key thing going forward will be giving them opportunities to explain their programming structures to the class, both to help them articulate what they are doing and to share good ideas that other students will hopefully want to try out and learn.

Looking back on last year's class, I realize I was not letting the students develop as much ownership of their projects as I could have by making the point of their projects being to move up through this sequence of concepts in a stepwise way. Rather than discovering the need for programming tools I was telling them when to use them so they never really took any interest in figuring out what they were for.

Tuesday, November 17, 2009

Wav2Rso: Making it Work Properly


Wav2Rso (scroll down) is a great program for doing one thing--converting WAV audio files to RSO format so they will play on a Lego NXT robot. You can take any WAV file--one you record or one you download from a website like findsounds.com--and put it on your robot. How fun! The only catch is that for some reason Wav2Rso is set to a sample rate of 8000 Hz. The typical WAV file is more like 11,025 Hz, so when you convert it, the sample lowers in pitch considerably and you have a quiet, baritone robot. The fix is to open the WAV file in Audacity or another audio editing program, edit the preferences to set the sample rate to 8000 Hz, then export it to WAV again. This file will convert properly and at the right frequency.

Wednesday, March 18, 2009

Robots in Different Cultures

I've been listening to the robotics podcasts on Talking Robots. Dario Floreano spent about 2 years until August 2008 interviewing top researchers in the field of robotics and artificial intelligence. The podcast archive is a gold mine of information for someone wanting to get a leg up on what the current trends are in the field. One theme mentioned in several interviews is the different levels of acceptance of robots by the general public in different countries. One interviewee, I wish I could remember who, summed it up by saying "The Japanese embrace robots in their daily life, Americans are afraid robots will take control of their lives, and Europeans think robots will take their jobs." I guess for my part I hope to dispell my students' fear of robots taking over by teaching them that robots are only ever doing what they've been told to do. The key is understanding what that is. Then you know what you're dealing with.

Sunday, November 09, 2008

Open Source Electronics


I've found another reason to love the Cricket. The electronics are open source, or at least some of the components are. I was having a lot of problems with wires coming out of the connectors that fasten them into the Cricket's ports. I received a bunch of crimped wires from the manufacturer that I had to splice onto the wires that came out until I started running out of those. Then I made a discovery in an unlikely source. My cordless phone battery was dying, so I went to Radio Shack to get a new one. It turned out they had changed the model and while the battery the sold was the same shape, voltage and amps as my bad one, the connector into the phone was a different shape. But the battery wires fastened into the connector in exactly the same way as the wires on the Cricket do. It turns out the crimps are a standard method of making a non-soldering wire connection. So all I have to do to fix the wires that come out is re-crimp them. There's even a page on the Molex web site (the manufacturer of the crimps) that shows how to make a good crimp.