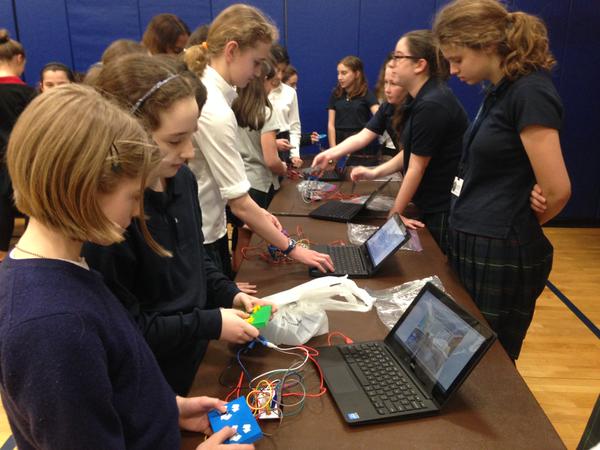
We got a Makerbot Replicator 2 last December (now a year-and-a-half ago) and one of the projects I came up with turned out really well, and I think is worth sharing. My 7th graders designed key press controlled games in Scratch, then designed hand-held controllers with embedded switches, and we connected MaKey MaKeys to the leads on the switches for a great game experience. The highlights
were putting on a game arcade event for our middle school and exhibiting the projects at this year's World Maker Faire here in New York City.
Design the Scratch Games
I wanted my students to be aware that you can make fun games based around important, socially relevant themes, and that they would have to do so with theirs. So before they started their own, they played some examples. Here is a list I found, but I would love suggestions on others:
- Stop Whaling Game by Greenpeace
- Wasteland Adventure about recycling
- Pipe Trouble about local effects of oil drilling and running pipelines
- Mission about homelessness (currently dead link but it is a great game!)
- Phone Story about where phone parts come from
The context of this project is a full-year robotics class so making games was a diversion into physical computing and game design. Not being experienced in game design they needed significant scaffolding for their game design algorithms. So I walked them through the basic programming for two game formats with the idea that they would pick one to develop further for their project.
Falling Object Game
Here is a link on Scratch to a template, http://scratch.mit.edu/projects/25316753/. To teach it I had them remix it before it had any scripts and together we went through the scripting. I didn't cover winning and losing score scripts until later, but the script for that looks like this, placed in the stage.

And of course you have to add backdrops for winning and losing. It's easy to add more cans, just by duplicating the existing one, then you have more of a challenge. Students extended this format in ways I will describe further down.
Side Scrolling "Flappy Bird" Game
Here is a link to this template, http://scratch.mit.edu/projects/23061550/. Again, they remixed mine without the scripts and we went through the scripting together. Adding the winning and losing conditions later on was a little more complicated because the background sprites were covering the win and lose screens.
 So in addition to adding the script above to the stage, another condition has to be added to the background sprites scripts that makes them hide if the score gets above or below the limits for the game. You could also get rid of the scrolling background sprites altogether and the game mechanic becomes one of flying objects coming at a character that isn't moving but just jumping up and down to avoid them.
Game Enhancements
Students decided on a game theme and picked one or the other mechanic, then made several modifications to extend their template. They changed all of the graphics using images from the Scratch library and images from the web. Some added sound effects. Some added animations to the character that played when they moved or when they got hit. Some added levels by changing the stage background if the score went above a certain amount. Some added lives that were subtracted when you get hit so you have only 3 chances to get hit, and some made it game over as soon as you were hit once. Tough! UPDATE: This year several students wanted to make unique games, and with more or less assistance they did, with amazing results.
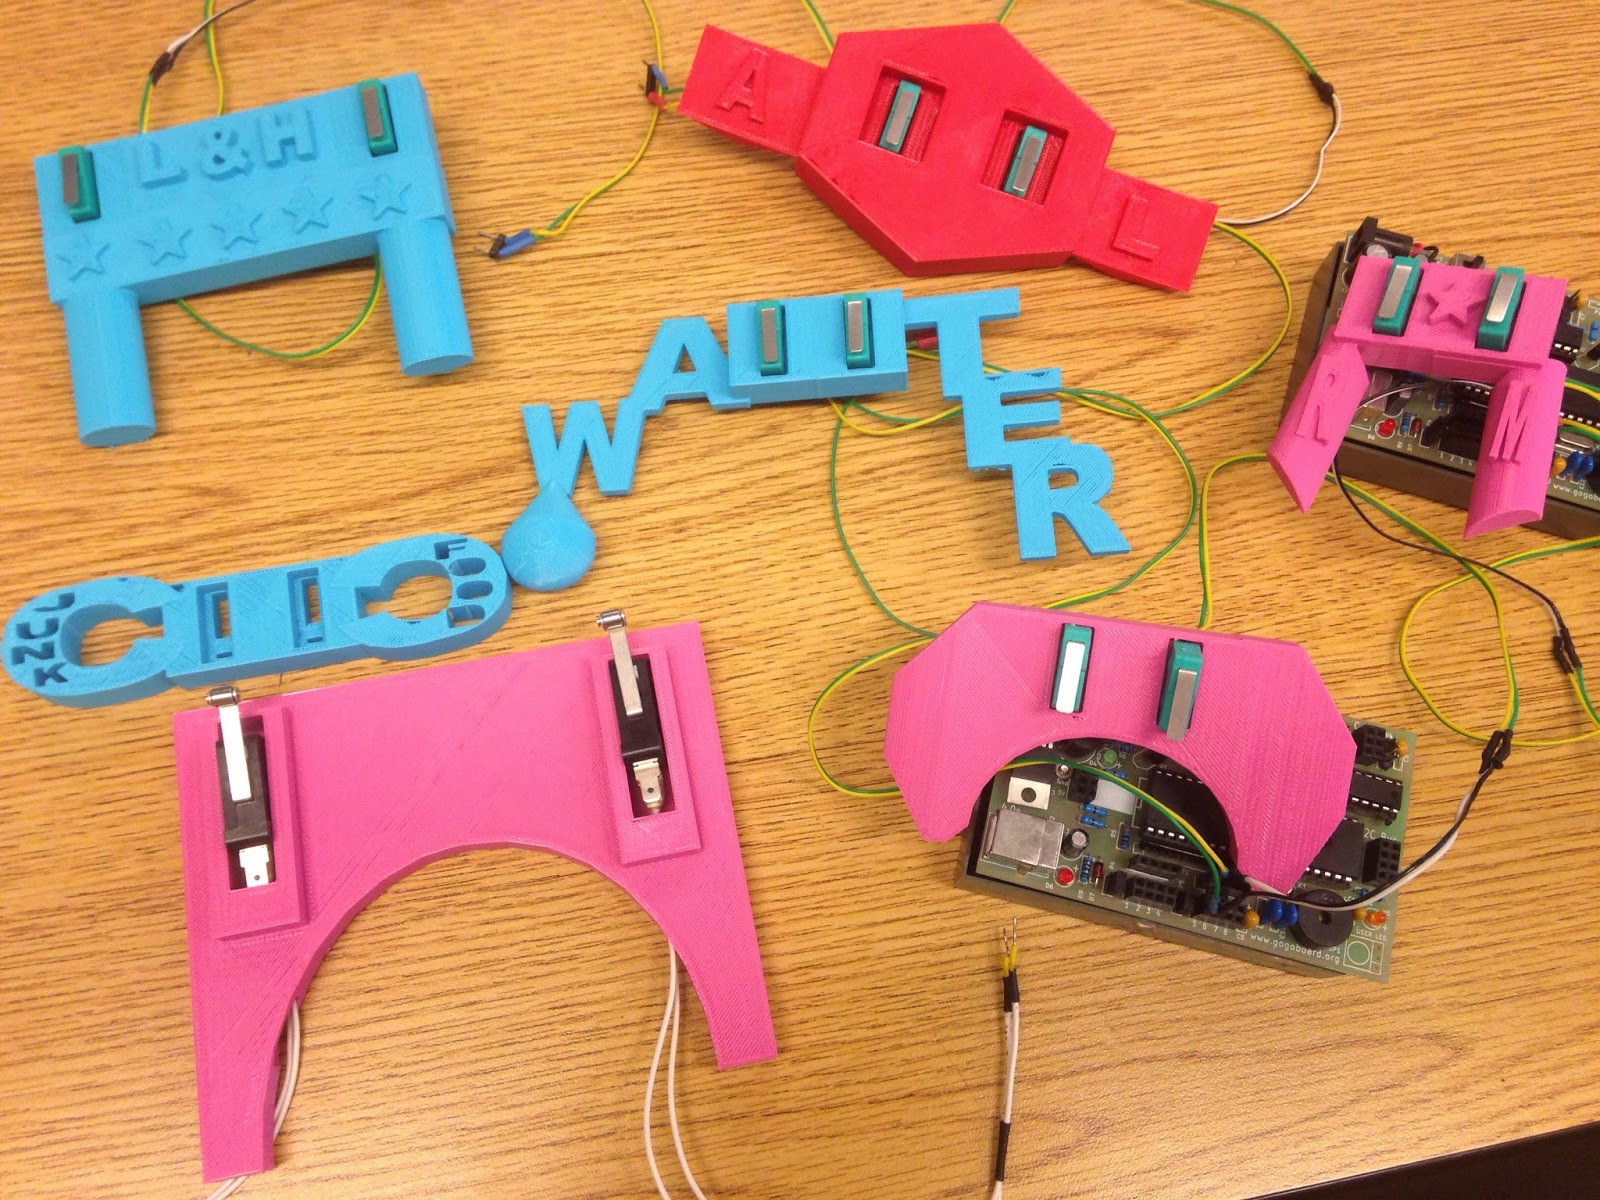
Designing Controllers
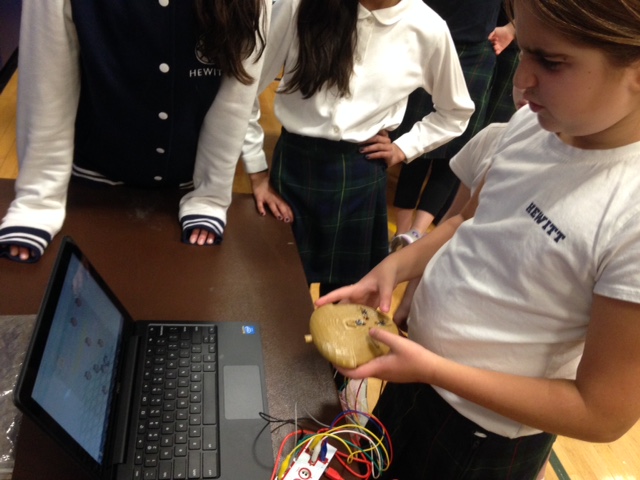
The MaKey MaKey extends basic gaming keys to the the physical world. All you need to activate a MaKey MaKey connected key is something conductive to close the circuit. While last year I used momentary lever switches from old robotics kits, this year I had students solder wire leads on to small tactile switches I had taken out of discarded printers, smoke alarms, and other e-waste.


The students used Tinkercad to design their controllers. There are several "lessons" they can learn basic skills, like making holes, grouping objects, and resizing.
Final Results
 |
| 2015 controllers |
 |
| 2014 controllers |


No comments :
Post a Comment