On starting up my Raspberry Pi today I found that my keyboard layout was set back to British, so I will have to find out how to permanently set that. No time right now, though. I did try starting Midori from the command line, which I found, obviously, required the X GUI to be started up. LXTerminal hangs on that command as long as Midori is running so I will have to learn about how to allow it to move on once the target program is running.
What I wanted to learn today I did learn, which is how to know where I am when the GUI is not running. This is not something you really know even with the GUI but the graphical illusion of a desktop gives you the feeling you are somewhere. So on the command line it helps to type 'pwd' to know your current working directory and 'ls' to know what directories and files are in your current location.
Thursday, July 12, 2012
Wednesday, July 11, 2012
Changing Keyboard Layout in Linux
Here's my learning for today, although I learned a lot just getting a picture on here and uploading it. (Once I added a USB hub it was a snap.) Open the LXTerminal and type setxkbmap -layout us. The LXTerminal is pretty fancy in that you can even get a right click menu on it (to copy from and to).
Here's my source: http://how-to.linuxcareer.com/linux-command-line-basics-for-beginners-part-3
Here's my source: http://how-to.linuxcareer.com/linux-command-line-basics-for-beginners-part-3
Raspberry Pi Photos


Raspberry Pi!
I have a Raspberry Pi! I have a lot to learn as I am barely familiar with Linux at all. But I've decided to learn 1 simple thing a day on it and blog what I learn. My goal for today, for example, is to find out how to change the keyboard mode from UK to EN! I know there is a command for that. (There's an app for that...) Eventually I will set it up in my school's library for students to use it and learn what they can do with it. It is exciting because in this age where computers are ubiquitous black box proprietary devices kids need to also see them as things to tinker with and learn to control in ways they want.
Hmm, how to get a photo I took of the Raspi on here to upload...
Wow, even more challenging than getting a photo on here it seems is getting Midori to handle publishing or saving a post with the blogger platform. It did warn me that there might be problems.
Ok, so I'm emailing it to the blog. I have to use my Outlook Web App account since my gmail account won't work in Midori either. Now, just for the record I don't have a problem with all of these hurdles. To me it's an indication of how sophisticated and at the same time inaccessible the software is that we have come to depend on day-to-day.
Sunday, April 29, 2012
LED Driver project, work in progress
I've been interested in the Arduino for a while now and played with it a little bit. Until now the most involved project I've done with it is playing around with variations on using it to program a web server with an ethernet shield. Well now I'm deep into something that is introducing me to the complexities involved in working a project up as a prototype with breadboards and then taking it to the next level by soldering components together on a generic PCB. I'm using a Philips 4794 LED driver to extend the Arduino's control of LEDs beyond the 8 or so it can control directly with pinouts. Actually I'm using 6 LED drivers to control 43 LEDs that spell out my son's name traced along his toddler version of his written name, bringing his early signature to life in a blinky way. To figure out the components and schematics I relied a lot on this post and this post, and then this post to extend to multiple LED drivers.
So, first the prototype:
 You can see here the Arduino (Duemilanove), breadboards, one LED driver, lots of leads.
 And here the LEDs and the circuitry behind.
For programming I used the example in the first link above and changed the value associated with the count variable to include larger numbers of LEDs. I still don't really understand how the program works and ultimately I would like it to do something a little different than it does so I will have to figure that out later. But since that worked for 16 LEDs I started working on a more permanent version. That work in progress is below. There is a lot of soldering to do. By the time I finish, he will be in college:
So, first the prototype:


For programming I used the example in the first link above and changed the value associated with the count variable to include larger numbers of LEDs. I still don't really understand how the program works and ultimately I would like it to do something a little different than it does so I will have to figure that out later. But since that worked for 16 LEDs I started working on a more permanent version. That work in progress is below. There is a lot of soldering to do. By the time I finish, he will be in college:
 |
| All 6 LED drivers are soldered in and I tested the circuit to make sure my sloppy soldering would work with one LED, which I was lucky enough to catch blinking for the camera. |
 |
| Sloppy soldering...I will blame the cheap soldering iron until I get a better one and will have no excuse. |
Thursday, April 26, 2012
Build Your Own Computer


Sunday, December 18, 2011
Do Women Make Technology Differently?
This is a very nice post by Carla Diana. It makes me more determined to bring opportunities to my school for girls to make technology.


Wednesday, November 30, 2011
Great Student Opensim Build: St. Peter's Basilica
 |
| St. Peter's Basilica, Maderno's Facade |
Sunday, September 25, 2011
Students Managing Their Own Data
 |
| Moodle RSS block |
 |
| Post on Tumblr |
 |
| Post pulled into Moodle page |
Why go to all this trouble? I think this exercise is important because they need to have experience making things with web tools for real purposes, not just using the web.
UPDATE on this: So one of my students got re-blogged by a porn site. I had to end the experiment. Fortunately I caught the spam before she could see it. Made me disappointed in the Internet.
Maker Faire NY
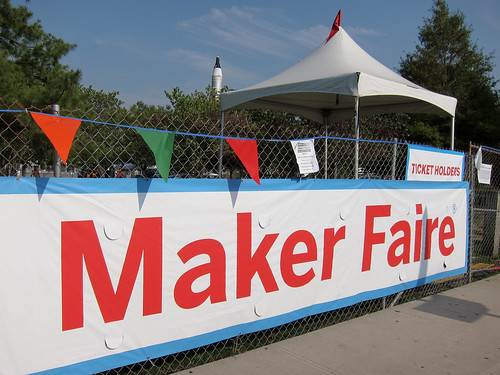
What amazed me was that most of the projects on exhibit were different from last year. Of course some things have already become and deserve to be standard fare, such as MakerBots and the Life Size Mouse Trap. But the growth of affordable 3D printer technology was evident with so many more types on exhibit. I'm just amazed at the successful effort to coordinate so many new makers and their work in one place. What an event!
Some highlights were watching my older students attend a 25 minute presentation at the lockpicking booth so determined to learn the secrets inside the average lock, seeing the younger students' delight at 3D printers printing chocolate and cheese, the middle schoolers playing with the robotic drummer, walking into a wacky techno duo set bathed in technicolor patterns with Game Boys and Casios hanging off the musicians, and interacting with so many kinds of robots. Putting Flip cameras in the hands of the students was great because as our groups split up to explore different areas I got to learn about twice as many amazing projects than I would have had we stayed in one group, like the keyboard-on-a-glove.


Subscribe to:
Posts
(
Atom
)
